


Table of Contents
- Why Accurate Measurement Matters for Custom Blinds
- Best Tools for Measuring Windows
- Inside Mount vs. Outside Mount Blinds
- Step-by-Step: Measuring Window Width and Height
- Checking Squareness and Window Depth
- Identifying Obstructions and Non-Rectangular Windows
- Why Professional Window Measurement Services Matter
- Recording and Verifying Your Measurements
- Frequently Asked Questions
Last Updated: September 24, 2026
Why Accurate Measurement Matters for Custom Blinds
Learning how to measure windows for custom blinds is the foundation of custom blinds that actually fit. When measurements are off by even a quarter inch, you end up with gaps that let light leak through, blinds that bind, or a look that feels sloppy.
Best Tools for Measuring Windows
A steel tape measure is the standard, but laser distance measurers offer advantages in specific situations.
Essential tools:
- Steel tape measure (25-foot minimum)
- Notepad or phone to record measurements
- Pencil
- Level (optional but helpful)
Optional but useful:
- Laser distance measurer
- Smartphone measuring app (as a backup, not primary)
Steel Tape Measure: The Standard
Steel tape stays rigid, won’t sag or stretch, and gives consistent readings. A 25-foot tape handles most residential windows.
Why steel tape works:
- Rigid blade prevents sagging
- Clear markings in 1/16-inch increments
- Affordable and durable
- Works in any light condition
Best practices with steel tape:
- Pull the tape taut but don’t overstretch it
- Keep the blade flat against the surface you’re measuring
- Read the measurement at eye level to avoid parallax error
- Measure twice and compare results before recording
- For inside-mount windows, measure at the narrowest point to ensure the blind will fit
Laser Distance Measurers: When to Use Them
Laser measurers project a beam to a surface and calculate distance electronically, offering advantages in specific scenarios.
Advantages:
- Highly accurate (typically ±1/8 inch over 50 feet)
- Faster for large windows or multiple measurements
- Easier to use alone, no need to hold a tape at both ends
- Useful for measuring ceiling height, depth, and obstructions
- Digital readout reduces misreading the tape
Disadvantages:
- More expensive than steel tape
- Requires a clear line of sight to the target
- Struggles with reflective or transparent surfaces
- Batteries can die mid-project
When a laser measurer makes sense:
- Measuring very tall windows or cathedral ceilings
- Measuring multiple windows in sequence
- Confirming depth or diagonal measurements
- Checking for squareness across large spans
- Measuring around obstructions where a tape won’t reach easily
When to stick with steel tape:
- Standard residential windows (under 6 feet wide or tall)
- Inside-mount measurements where precision is critical
- Situations where you need to measure at three points (top, middle, bottom)
- Any measurement where you want a physical record of the tape position
Recording Measurements
Write everything down immediately.
Create a simple chart:
| Location | Width | Height | Notes |
|---|---|---|---|
| Top | ___ | ___ | |
| Middle | ___ | ___ | |
| Bottom | ___ | ___ | |
| Diagonal 1 | ___ | ___ | |
| Diagonal 2 | ___ | ___ |
Take photos of your notes and the window as a backup.
Using a Level to Check Squareness
A level (24 inches or longer) helps you check if your window frame is square. Place it vertically against the left and right sides of the frame, the bubble should center on both. If one side leans, note it in your measurements. Out-of-square windows are common and not a deal-breaker; we account for it during installation.
Smartphone Measuring Apps: A Backup, Not a Primary Tool
Apps like Google Measure use augmented reality but lack the precision needed for custom blinds. Use them only as a rough check, not for primary measurements you’ll submit to us.
Inside Mount vs. Outside Mount Blinds
The mounting location changes how you measure. These are two completely different setups.
Inside Mount Setup
Inside mount means the blinds sit inside the window frame with brackets attached to the frame sides. This creates a clean, flush appearance. For inside mount, measure the width inside the frame and the height inside the frame at the widest point to ensure smooth operation.
Outside Mount Setup
Outside mount means brackets attach to the wall or trim around the window, covering the entire opening and extending beyond it for maximum light control. Measure the full width of the area you want to cover and the full height, typically extending 2-3 inches beyond the opening on all sides.
Step-by-Step: Measuring Window Width and Height
Accuracy here is everything. Small errors compound into visible gaps.
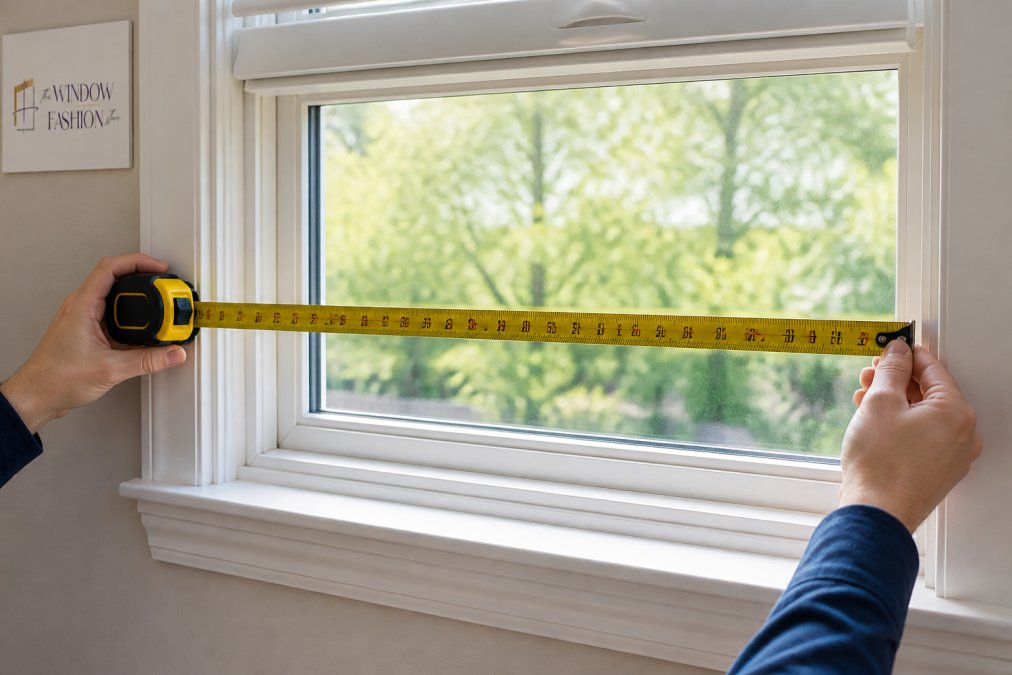
Measuring Width at Three Points
Measure the width at the top, middle, and bottom of the window opening. Place your tape at the left edge, pull it straight across to the right edge, and record all three numbers. Use the smallest measurement for inside mount to prevent binding; use the largest for outside mount to maximize coverage.
Measuring Height at Three Points
Measure at the left, center, and right sides of the opening. Start at the top, pull the tape straight down to the bottom, and record all three numbers. Use the smallest measurement for inside mount to prevent hitting the sill or header; use the largest for outside mount. Take your time, a half-inch error affects how the blinds look when raised or lowered.
Checking Squareness and Window Depth
Check squareness by measuring diagonals: top-left to bottom-right, then top-right to bottom-left. If they differ by more than 1/8 inch, your window is out of square, common in older homes but not a deal-breaker. For inside mount, measure window depth (how far the frame extends from the wall). Shallow frames may require outside mount.
Identifying Obstructions and Non-Rectangular Windows
Real windows rarely present a clean, unobstructed rectangle. Handles, locks, cranks, alarm sensors, and trim can interfere with blind operation or installation. Non-standard shapes add another layer of complexity. Understanding how to measure around these obstacles, and when they require special solutions, separates a successful custom blind order from one that arrives with fit problems.
Measuring Around Window Obstructions
Window cranks and handles are the most common obstructions. Measure the depth of the crank from the window frame to its furthest point. For inside mount, if your frame is shallower, outside mount may be necessary. For outside mount, ensure your blind depth clears the crank.
Measuring Non-Rectangular Windows
Arched, angled, triangular, and bay windows require custom approaches. Standard blinds won’t fit, but solutions exist.
Arched and circular windows:
-
Measure the width at the widest point (usually at the base)
-
Measure the height from the base to the peak of the arch
-
Measure the radius or arc depth if possible (this helps us understand the curve)
-
Note whether the arch is at the top, bottom, or wraps the entire window
-
Take a photo of the window from straight on, this shows the curve better than numbers alone
-
Bring this photo and your measurements to your consultation; we’ll discuss whether a shaped blind, a specialty product, or a combination approach works best
-
Measure the width at the top and bottom, they may differ
-
Measure the height on both the left and right sides
-
Use a level to determine the angle of the slope
-
Measure the depth of the frame at both the top and bottom
-
These windows often need custom-shaped blinds or a creative mounting solution; document everything clearly so we can assess feasibility
Bay windows:
- Treat each pane as a separate window, measure width and height for each section
- Measure the angles where the panes meet (typically 90, 120, or 135 degrees)
- Measure the depth of each section from front to back
- Decide whether you want one continuous blind across the bay or separate blinds for each pane
- Note any obstructions (handles, locks, trim) on each section
- Bring measurements and photos to your consultation; bay window solutions vary widely depending on the configuration
When to Bring Photos and Notes
For any non-rectangular window or obstruction-heavy situation, a photo is worth more than a written description. When you schedule your in-home design consultation, bring:
- Your measurement notes (width, height, diagonals, depth)
- Photos of the window from straight on and at an angle
- Photos of any obstructions, cranks, sensors, or trim
- Notes on what you want the blind to do (light control, privacy, aesthetics)
Why Professional Window Measurement Services Matter
You can measure your own windows. Many people do. But there’s a reason professional measurement exists.
Recording and Verifying Your Measurements
Write everything down. Create a simple chart:
| Location | Width | Height | Notes |
|---|---|---|---|
| Top | ___ | ___ | |
| Middle | ___ | ___ | |
| Bottom | ___ | ___ | |
| Diagonal 1 | ___ | ___ | |
| Diagonal 2 | ___ | ___ |
Take photos of your notes. Email them to yourself. This backup copy saves you if something gets lost.
Frequently Asked Questions
Should I round my window measurements up or down for custom blinds?
Round down to the nearest 1/8 inch for inside mount blinds to ensure they fit properly in the window opening without binding. For outside mount blinds, measure to the nearest 1/8 inch as well, then verify clearance for any obstructions like trim or hardware. Always record your exact measurements first, then round consistently. When in doubt, our team can verify measurements during a free consultation to guarantee accuracy before ordering.
What is the difference between inside mount and outside mount blinds?
Inside mount blinds fit within the window frame opening, creating a clean, recessed look and maximizing light control. Outside mount blinds attach to the wall or trim above and beyond the window, covering the entire frame and trim. Inside mount requires precise measurements of the window opening width and depth. Outside mount allows more flexibility but demands accurate measurements of the mounting surface area. Each has different measurement requirements and aesthetic results. Visit our Design Gallery to see examples of both styles with our products.
Can I measure my windows for blinds using my phone?
Smartphone measurement apps can estimate distances but lack the precision needed for custom blinds. A physical steel tape measure provides the accuracy required for proper fit and function. Most phone apps have a margin of error that could result in gaps, binding, or poor light control. For critical measurements, use a 25-foot steel tape measure at minimum. Our professional window measurement services ensure every dimension is verified multiple times to eliminate guesswork and installation issues.
Why is professional measurement recommended for custom window treatments?
Professional window measurement services catch details homeowners often miss: uneven window frames, obstructions, depth variations, and non-rectangular shapes. Our team has over 20 years of experience identifying these issues before they become costly problems. We measure at multiple points, verify squareness, check for clearance, and document everything. This precision prevents gaps, light leaks, and binding that compromise function and appearance. Schedule a free consultation to have our experts measure your windows and bring sample books to your home.
Measuring windows accurately takes patience and attention to detail, but it’s the critical first step toward custom blinds that fit beautifully and function perfectly. Get it right, and your new window treatments will look professional and feel custom-made, because they are. Schedule a free consultation with The Window Fashion Store and let our team handle the precision measurements and professional installation your windows deserve.